A building project involves dozens of decisions, deadlines, materials, inspections, and people. Whether you are constructing a new home, renovating an existing property, or managing a small commercial project, it is easy to overlook an important task when everything is happening at once. A well-organized building checklist helps you keep the work on track, communicate clearly with contractors, and identify problems before they become expensive repairs.
This guide walks through the main stages of a building project, from early planning and site preparation to construction, finishing, and handover. Use it as a starting point, then adapt each item to your property, local building codes, project budget, and professional advice. Requirements vary by location and building type, so confirm permits and technical decisions with the relevant authorities and qualified professionals.
For a printable overview, use the Building Checklist Template below to record project details, mark completed tasks, and write notes as the work progresses.
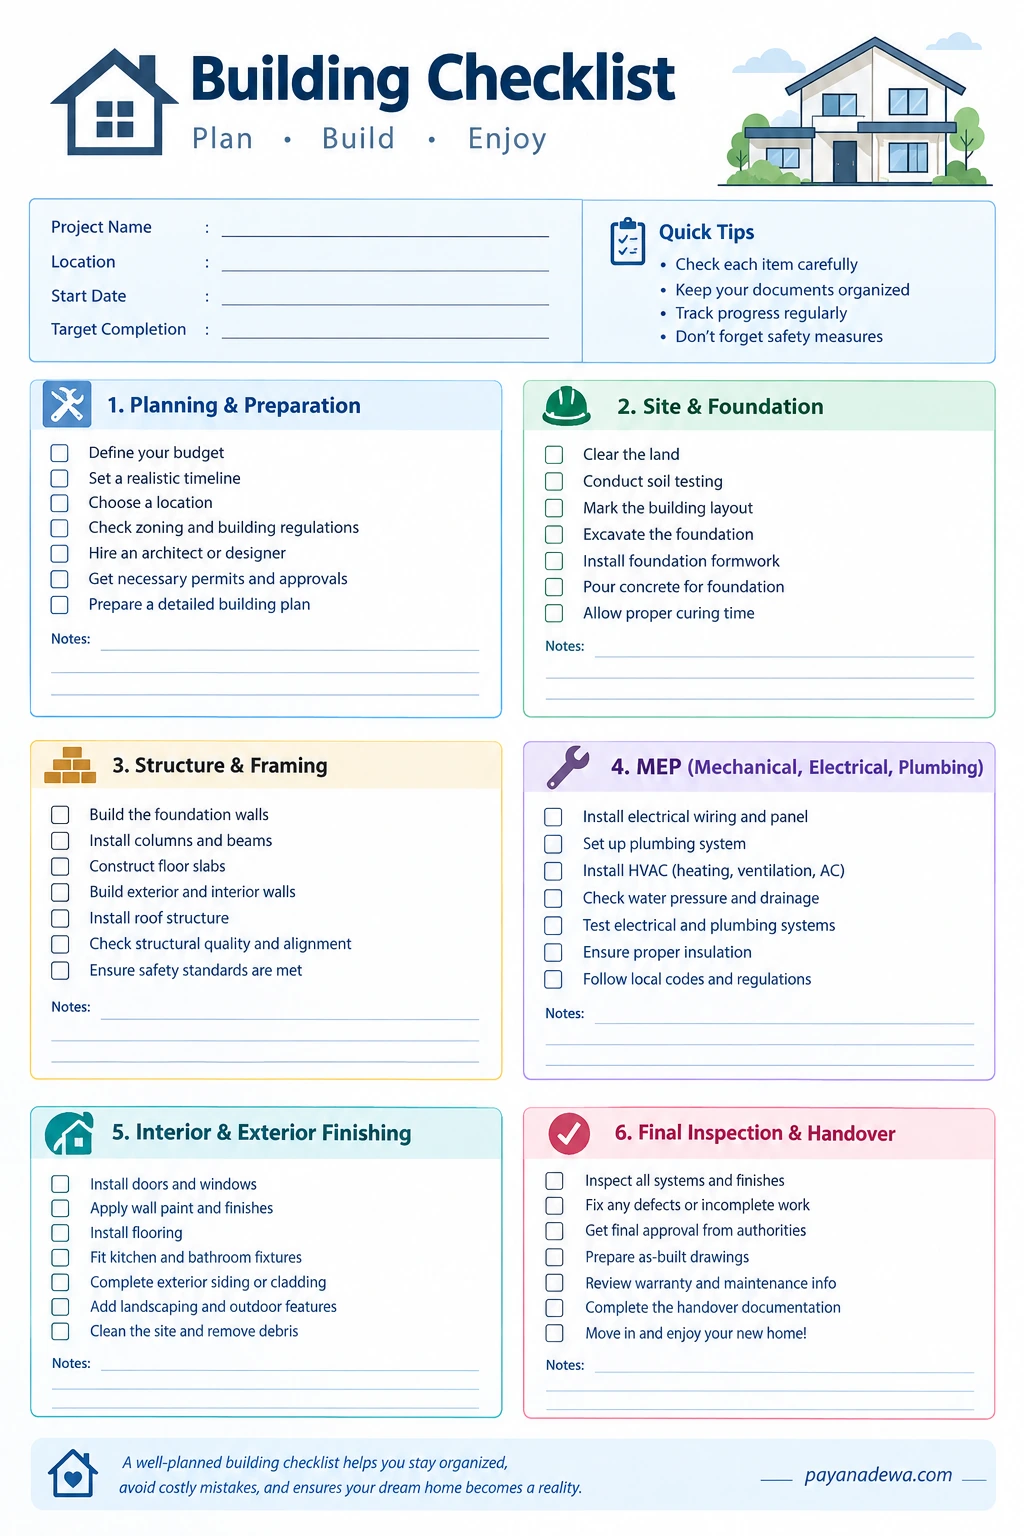
Why Use a Building Checklist?
A checklist turns a complicated project into smaller, manageable actions. Instead of relying on memory or scattered messages, you can see what has been completed, what needs attention, and who is responsible for the next step. It also creates a shared reference for owners, designers, builders, and subcontractors.
- Reduce oversights: Keep important tasks visible throughout the project.
- Improve coordination: Align schedules for contractors, deliveries, inspections, and approvals.
- Control costs: Identify scope changes and unfinished work before making final payments.
- Document progress: Record decisions, approvals, receipts, photographs, and inspection results.
- Support safety and quality: Make sure safety procedures and required checks are part of the routine.
A checklist cannot replace an architect, engineer, building inspector, or licensed trade professional. Instead, it helps you ask better questions and confirm that the right people have completed the right tasks.
1. Planning and Preparation
Good construction begins before anyone breaks ground. The planning stage establishes the project scope, budget, timeline, design, and legal requirements. Changes made on paper are usually easier and less expensive than changes made after construction has started.
Define the project and budget
- Write down the purpose, size, and essential features of the building.
- Set a realistic budget that includes labor, materials, design fees, permits, utility connections, and site work.
- Reserve a contingency fund for unexpected conditions or approved changes.
- Establish a target completion date while allowing time for weather, deliveries, and inspections.
- Decide how changes to the scope will be reviewed, priced, and approved.
Confirm design and approvals
- Choose a suitable site and verify access, boundaries, easements, and relevant restrictions.
- Arrange surveys, soil testing, and other site investigations when required.
- Work with qualified designers and engineers on plans and structural details.
- Check zoning rules, building codes, energy requirements, and local permit conditions.
- Obtain required permits and written approvals before starting regulated work.
- Review contractor qualifications, insurance, references, contracts, and payment milestones.
Practical tip: Keep the latest approved drawings and specifications in one clearly labeled folder. Share the same current version with everyone involved to reduce confusion caused by outdated plans.
2. Site Preparation and Foundation
Site preparation creates a safe, accessible work area and establishes the base for the structure. Errors at this stage can affect drainage, stability, and the alignment of the entire building, so follow the approved plans and the direction of the responsible professionals.
- Confirm property boundaries and mark the building location.
- Arrange safe site access, temporary fencing, signage, and required safety facilities.
- Identify existing utility lines and arrange protection or relocation where necessary.
- Clear vegetation and debris as permitted, then complete excavation to the approved dimensions.
- Verify soil conditions and bearing requirements with the appropriate professional.
- Check formwork, reinforcement, embedded items, and foundation dimensions before concrete placement.
- Complete required pre-pour inspections and document approval.
- Place and cure concrete according to the specifications and weather conditions.
- Install specified waterproofing, damp-proofing, drainage, and backfill systems.
- Confirm foundation alignment and levels before proceeding to the next stage.
Do not cover work that requires inspection until the responsible inspector or professional has approved it. Take dated photographs of important elements before they become concealed.
3. Structural Work and Framing
The structural stage forms the building’s main framework. Depending on the design, it may include columns, beams, load-bearing walls, floor systems, roof framing, and other structural components. Materials and installation methods must match the approved design.
- Inspect delivered materials for damage and verify that they match the specifications.
- Build structural walls, columns, beams, and floor systems according to the plans.
- Install roof framing and required bracing or connections.
- Check dimensions, plumb, level, alignment, and connection details.
- Confirm that openings for doors, windows, stairs, and services are in the correct locations.
- Arrange structural inspections at the required milestones.
- Protect exposed materials from moisture and other site damage.
Practical tip: If the site team proposes a structural change, pause the affected work until the appropriate designer or engineer reviews and approves the change in writing. An informal on-site adjustment can create safety, compliance, or warranty problems.
4. Mechanical, Electrical, and Plumbing Systems
Mechanical, electrical, and plumbing systems—often called MEP—make the building functional and comfortable. These systems are frequently installed before walls and ceilings are closed, which makes coordination especially important.
Electrical and lighting
- Confirm outlet, switch, lighting, and equipment locations against the approved layout.
- Have qualified electricians install wiring, panels, grounding, and protective devices as required.
- Coordinate electrical routes with structural members and other services.
- Complete required testing and inspections before covering the installation.
Plumbing, drainage, and ventilation
- Check water supply, drainage, and fixture locations.
- Test pipes and connections for leaks using the required procedures.
- Verify drainage falls, cleanouts, and access points where applicable.
- Install ventilation, heating, cooling, and exhaust equipment according to the design.
- Check insulation around pipes and ducts where specified.
- Label key shutoffs and service panels for future maintenance.
Before closing walls, ceilings, or floors, photograph concealed services and keep test records. Coordinate these installations with the framing and finishing teams so that late changes do not damage completed work.
5. Interior and Exterior Finishing
Finishing work gives the building its final appearance and protects it from everyday use and weather. Although finishes are highly visible, quality depends on proper preparation and the condition of the surfaces beneath them.
- Install approved insulation, air barriers, and moisture-control layers where specified.
- Complete exterior cladding, roofing details, flashing, sealants, and weatherproofing.
- Install windows and doors, then check operation, locks, seals, and alignment.
- Prepare walls and ceilings before painting or applying other finishes.
- Install flooring, skirting, cabinetry, countertops, and interior trim.
- Fit plumbing fixtures, electrical accessories, appliances, and ventilation grilles.
- Seal wet areas and verify that bathrooms, kitchens, and other vulnerable spaces are properly protected.
- Complete exterior paths, drainage, landscaping, and other agreed site works.
- Remove construction debris and protect finished surfaces from damage.
Inspect finishes in good lighting and compare them with the agreed specifications or samples. Record defects clearly, including the location and a photograph, so the contractor can resolve each item efficiently.
6. Final Inspection, Documentation, and Handover
Practical completion is more than a building that looks finished. Before moving in or accepting the project, confirm that required inspections have taken place, systems work as intended, outstanding defects are recorded, and the necessary documents are available.
Final inspection checklist
- Walk through every room, exterior area, and accessible service space.
- Test doors, windows, locks, lights, outlets, plumbing fixtures, and installed equipment as appropriate.
- Check for visible leaks, cracks, incomplete sealant, damaged finishes, and drainage issues.
- Confirm that agreed corrections and outstanding items are listed in writing with target dates.
- Obtain final approvals, certificates, or occupancy documentation required by local rules.
- Collect warranties, product manuals, maintenance instructions, and contractor contact details.
- Request as-built drawings and records of approved changes where applicable.
- Confirm that keys, access codes, controls, and safety information have been handed over.
- Agree on the process for reporting defects after handover.
Keep a copy of the signed contract, approved plans, permits, inspection reports, invoices, warranties, and handover documents. These records can be valuable for maintenance, insurance, future renovations, or resolving disputes.
How to Make Your Building Checklist Work
A checklist is most useful when it is updated regularly and connected to clear responsibilities. Use these habits to make it part of your project routine:
- Assign an owner to each task. Identify who is responsible and who must approve completion.
- Add dates and dependencies. Note when a task should begin, when it is due, and which earlier task must be finished first.
- Use clear status labels. Choose simple terms such as Not Started, In Progress, Needs Review, and Complete.
- Keep evidence. Attach receipts, inspection records, test results, and dated photographs where useful.
- Review the list weekly. Discuss delays, material shortages, safety concerns, and decisions needed.
- Record changes. Document the reason, cost, schedule effect, and approval for every significant change.
- Customize the template. Add project-specific tasks and remove items that do not apply, while retaining all legally or technically required checks.
For a small renovation, a simple spreadsheet or printed page may be enough. For a larger build, consider a shared project management tool that tracks responsibilities, documents, deadlines, and approvals in one place.
Common Building Checklist Mistakes to Avoid
- Starting before approvals: Confirm required permits and conditions before beginning regulated work.
- Using vague tasks: Replace “finish electrical” with specific, verifiable items such as “complete installation and record required test results.”
- Closing up work too early: Schedule inspections and photograph concealed services before covering them.
- Ignoring change orders: Get scope, price, and schedule changes documented before authorizing the work.
- Leaving handover until the last day: Gather manuals, certificates, warranties, and defect lists throughout the project.
Conclusion
A reliable building checklist helps transform a complex construction project into a series of clear, manageable steps. By organizing planning, site preparation, structural work, building services, finishes, and final inspection, you can improve communication, track progress, and catch issues before they become bigger problems.
Use the printable template as a practical starting point, tailor it to your project, and review it with the qualified professionals responsible for the work. Most importantly, follow local regulations and approved plans, keep accurate records, and never treat a checklist as a substitute for required inspections or expert judgment. With consistent tracking and careful documentation, you will be better prepared to move from the first plan to a well-managed handover.
I really like it whenever peopole cme together and share
thoughts. Great website, keep iit up! xnxx