Whether you need a birthday greeting, a thank-you note, a holiday card, or a little message just because, a printable folded card template makes the process easier. It gives you a clear layout to follow, helps keep the panels aligned, and leaves room for your own colors, illustrations, and words. With the right paper and a careful fold, even a beginner can create a neat, attractive result.
What Is a Folded Card?
A folded card is a sheet of paper or cardstock that is folded to create two or more panels. A common half-fold design opens like a small book. The front panel usually carries a greeting or illustration, while the inside provides space for a personal message. The back may be left plain or used for a small signature, logo, or decorative detail.
Folded cards are popular because they are easy to make, easy to personalize, and suitable for many occasions. You can keep the design minimal with a short message and a small motif, or make it more decorative with flowers, patterns, photographs, and layered paper.
What You Need to Make a Folded Card
Gather your materials before you begin. A simple setup helps you work neatly and avoid rushing while the card is being assembled.
- Paper or cardstock: Choose a weight that folds cleanly but feels sturdy. Cardstock is a good option for a card that needs to stand upright.
- Printer: Use a home printer if you are working from a printable card template.
- Ruler: Helpful for measuring the center line and checking the card’s dimensions.
- Pencil: Use light marks for measurements, then erase them when the card is finished.
- Scissors or a paper trimmer: Cut along the outside edges for a clean shape.
- Bone folder or a blunt scoring tool: Create a sharper crease without tearing the paper.
- Decorative supplies: Pens, stickers, ribbon, stamps, or pressed flowers can add a personal touch.
How to Use a Printable Folded Card Template
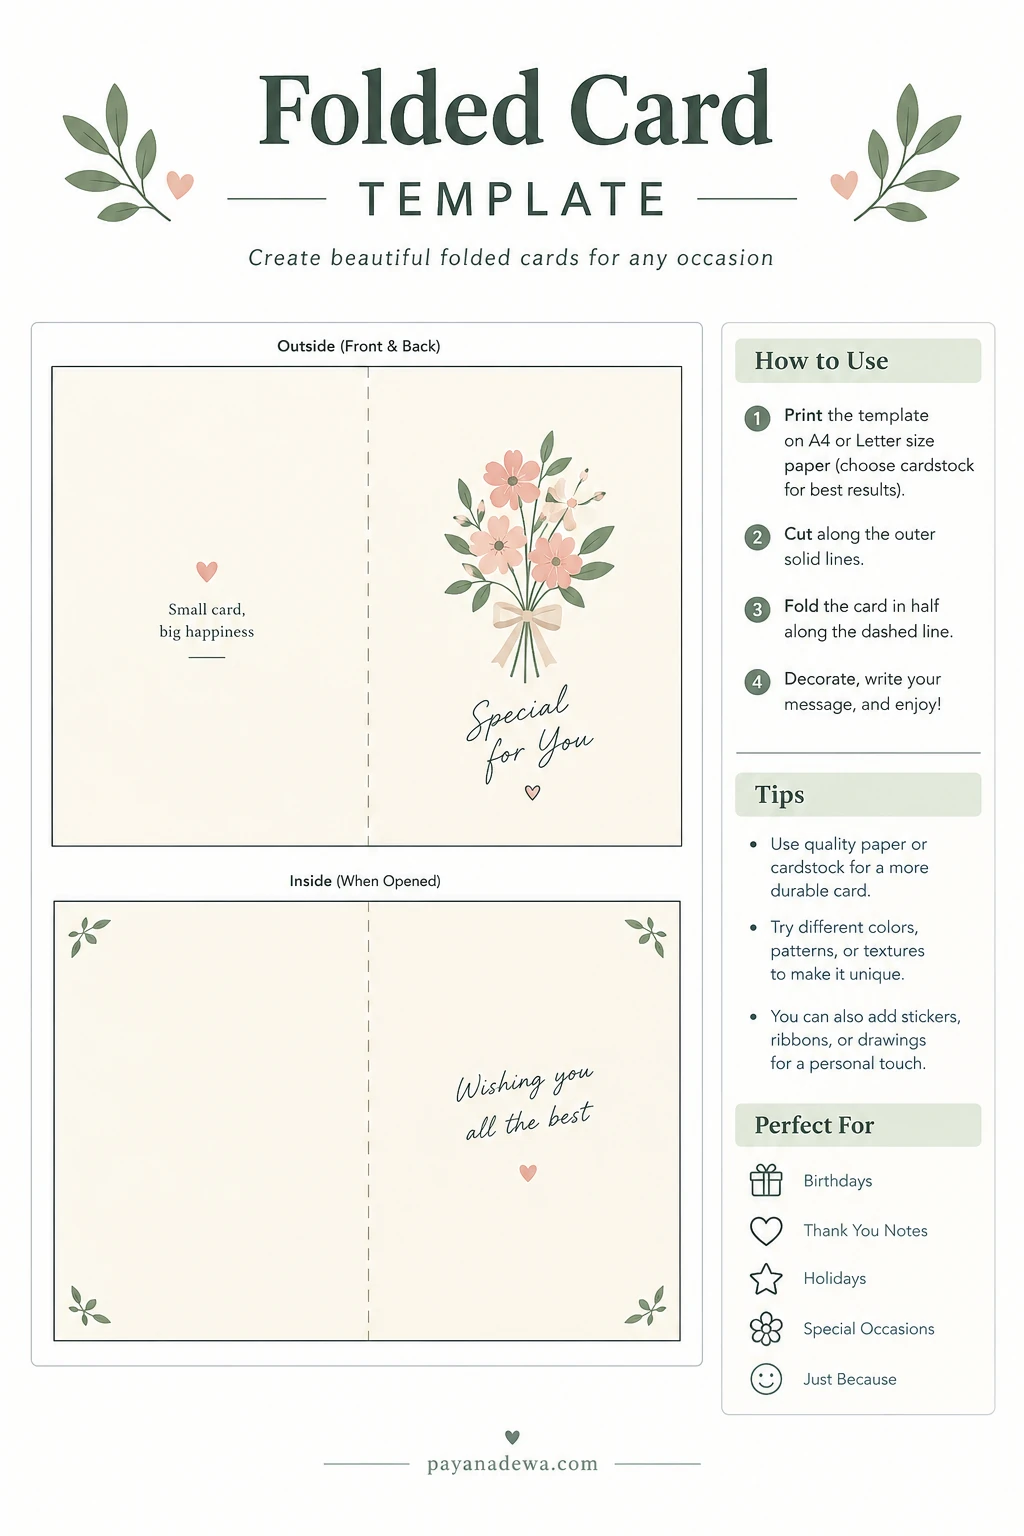
A template gives you a useful starting point, especially if you want both sides of the card to line up. Before printing, check the page size and confirm that the design fits your paper. If the template includes solid outer lines and a dashed center line, the solid lines usually show where to cut and the dashed line indicates where to fold.
1. Choose the right paper size
Check whether the template is designed for A4 or US Letter paper. Select the matching setting in your printer dialog and use “actual size” or 100% scale when the dimensions need to remain accurate. If you choose “fit to page,” review the print preview first because the printer may shrink the layout.
2. Print a test copy
If you are unsure about the sizing, print one copy on ordinary paper. Fold it and check the alignment before using your best cardstock. This quick test can help you spot margins that are too narrow, text that sits too close to an edge, or a fold that does not line up with the artwork.
3. Cut along the outer edge
Use scissors for a small project or a paper trimmer for straighter edges. Cut slowly and keep the sheet flat. If your template has a border, decide whether you want to preserve it as part of the design or trim it away.
4. Score and fold the center line
Measure the midpoint if the template does not show a fold guide. Lightly score the line with a ruler and a blunt tool, then fold the paper inward. Avoid pressing too hard, particularly with coated or printed paper, because the surface can crack. Run a bone folder or the back of a spoon along the crease to make it crisp.
5. Add your message and finishing touches
Write the inside message after folding the card so you can judge the available space. Let ink dry before closing the card. Add a small illustration, sticker, ribbon, or contrasting paper accent if it suits the occasion, but leave enough open space for the message to remain easy to read.
Creative Folded Card Ideas for Different Occasions
The best part of making a card yourself is that you can adapt the layout to the person and the event. Keep the main design simple, then change the message, colors, and small decorative elements to fit the moment.
Birthday cards
Choose cheerful colors, balloons, stars, or a favorite hobby as the cover theme. Inside, include a warm wish and a specific detail that makes the greeting personal. For example, mention a shared memory or something you hope the recipient enjoys in the coming year.
Thank-you cards
A clean design with a small flower, heart, or simple border works well for a thank-you note. Be specific about what you appreciate. A short, sincere message often feels more meaningful than a long general statement.
Holiday and seasonal cards
Use leaves, snowflakes, stars, or seasonal colors to make the design feel timely. If you are creating several cards, keep the same basic template and change a small detail on each one. This saves time while still allowing each card to feel personal.
Romantic and just-because cards
Soft colors, botanical illustrations, or a handwritten note can create a gentle, thoughtful look. You do not need an elaborate design: a few sincere lines inside a neatly folded card can be enough to brighten someone’s day.
Tips for a Neat, Professional-Looking Folded Card
- Keep important text away from the edges. Leave a comfortable margin so words and illustrations are not trimmed accidentally.
- Use a high-quality print setting. Choose a suitable paper type in the printer settings and allow the ink to dry fully.
- Test double-sided printing. If the template prints on both sides, check the paper orientation with a plain test sheet first.
- Make the fold before adding bulky decorations. Thick embellishments near the crease can make the card difficult to close.
- Check the finished card under good light. Look for stray pencil marks, uneven cuts, smudges, or text that is hard to read.
- Match the design to the recipient. A restrained layout may suit a formal thank-you, while bright colors may work better for a child’s birthday.
Common Mistakes to Avoid
One frequent mistake is printing at the wrong scale. This can leave the card too large for the envelope or move the fold away from the center. Always check the page size and print preview. Another issue is using paper that is too thin; it may wrinkle, show ink through the back, or fail to stand neatly when opened.
It is also easy to overcrowd the cover with text and decorations. Choose one main visual element and one short greeting, then save the inside for the longer message. Finally, do not fold against a printed guide without checking the orientation. A quick test fold can prevent the cover from ending up upside down or on the wrong panel.
How to Store or Share Your Finished Card
Let any wet ink, glue, or paint dry completely before closing the card. If you plan to mail it, choose an envelope that fits without forcing the card into the corners. For handmade embellishments, check the thickness and weight before mailing because bulky decorations may require extra postage. Keep unused printed templates flat in a folder so they are ready for another project.
You can also save a digital copy of your design and personalize it again for future occasions. Change the colors, greeting, or illustration while keeping the same fold layout. This is a practical way to create a coordinated set of greeting cards for birthdays, holidays, and everyday notes.
Conclusion
A folded card is an easy, thoughtful craft that can turn a few simple materials into a personal keepsake. With a printable folded card template, the process becomes more straightforward: choose the correct paper, print at the right scale, cut carefully, score the center, and add a message that feels genuine. Whether you are making a birthday greeting, a thank-you note, or a card for no special reason, a clean layout and a personal touch are what make the finished card memorable.