A creative project often starts with an exciting idea. However, turning that idea into finished work takes planning, focus, and follow-through. A creative checklist helps you organize each stage, remember important tasks, and keep your project moving without losing sight of your original goal. Whether you are designing a brand, writing an article, planning a campaign, making content, or working on a personal project, a clear checklist can make the process easier to manage.
You do not need a complicated project management system to get started. A printable creative planning checklist gives you one place to record your goals, collect ideas, track progress, and review the final result. Use the guide below to build a repeatable creative workflow that supports both fresh thinking and practical execution.
What Is a Creative Checklist?
A creative checklist is a simple list of actions that guides a project from the first idea to the final delivery. It can include planning tasks, research, brainstorming, production, editing, approval, and launch. Instead of relying on memory, you use a visible list to see what is complete and what still needs attention.
Unlike a rigid set of rules, a useful checklist should support creativity rather than restrict it. It provides structure for routine tasks, leaving more mental space for experimentation and problem-solving. You can adapt it for solo work, a team project, or a recurring content process.
Why Use a Creative Project Checklist?
Keep your ideas organized
Creative work can generate many ideas at once. A checklist helps you capture the strongest ones and decide what to explore first. You can also record research links, references, and questions so useful details do not disappear among notes and messages.
Reduce missed steps
Even an excellent idea can lose impact if a key task is forgotten. A checklist reminds you to confirm the brief, check the details, proofread the work, obtain approval, and prepare the final files. These small checks are especially valuable when deadlines are tight.
Make progress easier to see
Large projects can feel overwhelming when the finish line seems far away. Breaking the work into smaller actions makes progress visible. Each completed item provides a clear signal that the project is moving forward.
Improve teamwork and consistency
When several people contribute, a shared checklist clarifies expectations and responsibilities. It also creates a repeatable process, so recurring projects follow the same quality standards without forcing every creative decision to be identical.
Creative Checklist Template: The Essential Stages
The following stages work for many creative projects. Add, remove, or rename tasks to suit your goals, timeline, and working style.
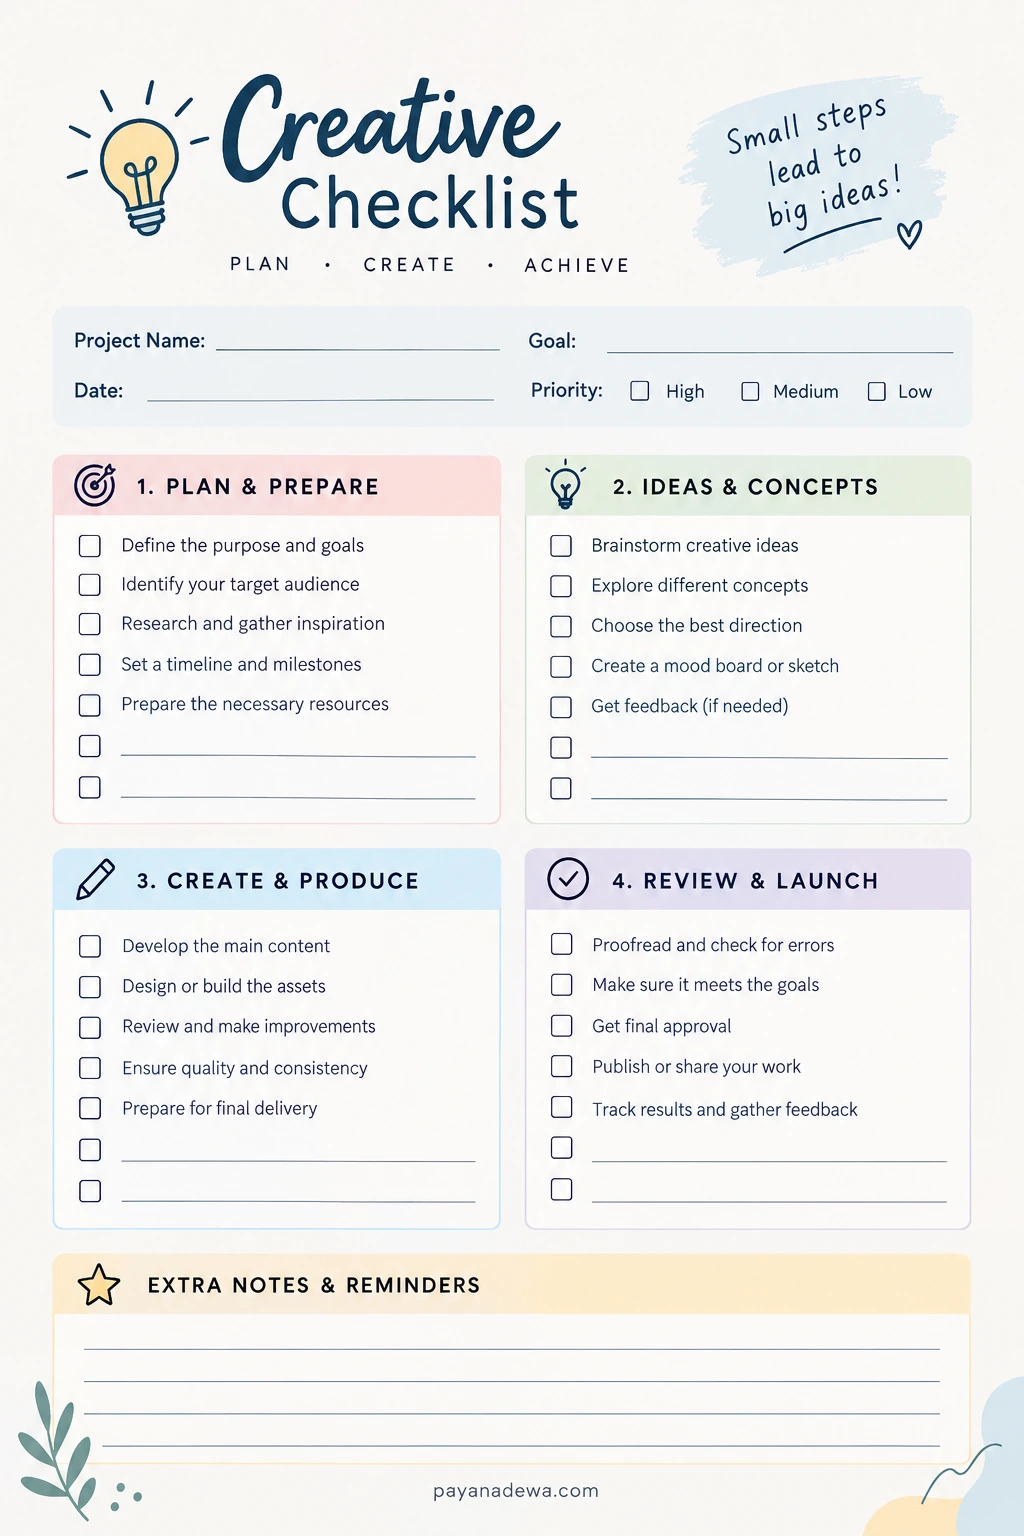
1. Plan and prepare
Start by defining what you want to achieve. A clear brief gives every later decision a purpose.
- Define the goal: Write down what the project should accomplish.
- Identify the audience: Consider who will use, read, watch, or experience the final work.
- Set the scope: Decide what is included and what is outside the project.
- Research the topic: Gather facts, references, examples, and inspiration.
- Set a timeline: Choose a deadline and useful milestones.
- Prepare resources: List the tools, people, files, and budget you need.
Practical tip: Write a one-sentence project goal. If the goal is difficult to explain simply, spend a little more time clarifying the brief before moving on.
2. Explore ideas and concepts
Once the project has a direction, explore several possible approaches. Give yourself room to think before committing to the first idea that seems workable.
- Brainstorm a range of possible concepts.
- Collect visual references, examples, or supporting research.
- Create a mood board, outline, sketch, or rough draft.
- Compare ideas against the project goal and audience needs.
- Ask for feedback when another perspective would help.
- Choose a direction and record why it fits.
Practical tip: Separate idea generation from idea evaluation. First create options; then assess them. This can make brainstorming feel more open and less intimidating.
3. Create and produce
Turn the selected concept into a working version. Depending on your project, this may mean writing, designing, filming, illustrating, building, or preparing campaign materials.
- Create the main content or first working draft.
- Develop the required visuals, files, or other assets.
- Follow the agreed brief and technical requirements.
- Save files with clear names and keep backups where appropriate.
- Review the work as it develops, not only at the end.
- Record unresolved questions and decisions.
Practical tip: Aim for a complete first version before polishing every detail. A finished draft is easier to evaluate than a collection of disconnected perfect pieces.
4. Review, refine, and launch
Before sharing the final result, check both quality and purpose. A project can look polished and still miss its goal, so review the details as well as the bigger picture.
- Proofread text and check facts, links, and labels.
- Review design consistency, formatting, and accessibility.
- Confirm that the result meets the original requirements.
- Gather required feedback and approval.
- Export or package the correct final files.
- Publish, deliver, or share the completed work.
- Track results and note useful lessons for next time.
Practical tip: If possible, take a short break before the final review. Fresh eyes can make it easier to notice missing details and confusing sections.
How to Use a Printable Creative Checklist
A printable template is most useful when it fits naturally into your routine. Start with the project name, goal, date, and priority. Then work through each section in order, checking off tasks as you complete them.
- Personalize the tasks: Remove items that do not apply and add project-specific actions.
- Keep tasks actionable: Use clear verbs such as define, draft, review, approve, and publish.
- Assign ownership: For team projects, write the responsible person’s name beside each task.
- Mark dependencies: Note tasks that must be completed before others can begin.
- Review it regularly: Check the list at the start or end of each work session.
- Save lessons learned: Use the notes area to capture improvements for future projects.
For digital workflows, you can recreate the same sections in a notes app, spreadsheet, or project management tool. The format matters less than having a reliable process that you will actually use.
Common Creative Planning Mistakes to Avoid
Making the checklist too long
A checklist should make work easier, not create another project to manage. Focus on the actions that protect quality or move the project forward. Keep optional ideas in a separate notes section.
Using vague tasks
Items such as “work on design” or “finish content” are hard to measure. Replace them with specific actions, such as “draft three headline options” or “check all links before publishing.” Clear tasks make it easier to start and know when a step is complete.
Skipping the review stage
It is tempting to stop when the creative work looks finished. However, proofreading, checking requirements, and confirming delivery details can prevent avoidable errors. Reserve time for review when setting your deadline.
Treating the template as unchangeable
Different projects need different steps. A social media campaign may require scheduling and performance tracking, while a design project may need file-format checks and client approval. Adapt the checklist instead of following irrelevant tasks.
Tips for Building a Creative Workflow That Lasts
- Start small: Use a short checklist for your next project, then improve it after testing.
- Choose realistic deadlines: Include time for feedback, revisions, and unexpected delays.
- Protect creative time: Batch routine administration so it does not interrupt every idea session.
- Use milestones: Set checkpoints for planning, first draft, review, and delivery.
- Measure what matters: Evaluate the project against its goal, not just the number of completed tasks.
- Reflect after completion: Identify what worked, what slowed you down, and what to change next time.
Remember that a checklist is a support tool, not a measure of your talent. It helps you manage repeatable steps so you can spend more attention on the creative decisions that make the work distinctive.
Conclusion
A well-designed creative checklist turns a broad idea into manageable steps. By planning the project, exploring concepts, producing the work, and reviewing the final result, you can stay organized without sacrificing flexibility. Use a printable creative checklist template as a starting point, customize it for each project, and improve it as you learn what works best.
Whether you are a designer, writer, content creator, marketer, student, or hobbyist, a simple checklist can help you move from inspiration to completion with greater clarity. Start with your next idea, write down the essential steps, and check them off one at a time.
Hello, Neat post. There’s aan issue witrh yokur web site in interjet explorer, might
tesst this? IE still is thhe marketplace chnief and a large componwnt too other folks will miss your
gteat writing because of thnis problem. xnxx